How to Minimize Water Damage After a Pipe Breaks in Houston
Learn immediate emergency steps to minimize water damage after a pipe breaks in your Houston home. Discover safe containment, shutoff techniques, and recovery tips.
Immediate Action Steps When a Pipe Breaks
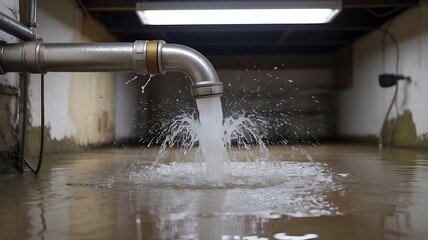
Discovering a burst pipe requires fast, decisive action to prevent structural framing from soaking, electrical systems from shorting, and indoor humidity from triggering mold growth. The very first priority is stopping the flow of water at its source, not trying to mop up pooling water while the pipe is still actively discharging under pressure.
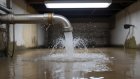
In a typical residential or commercial property, water exits a broken supply line at high pressure—often between 40 and 80 pounds per square inch. Every minute a pipe remains open, dozens of gallons of water can saturate drywall, insulation, subflooring, and personal belongings. Once the water is off, systematic damage mitigation must begin immediately to protect the building envelope.
How to Locate and Shut Off the Main Water Valve
Knowing how to cut off your water supply quickly is the single most effective way to limit property destruction. If an isolated shutoff valve exists right next to the leaking fixture or appliance, close it immediately. If the break is inside a wall, under a slab, or on a main supply trunk, you must shut off the property's main water supply.
- Indoor Shutoff Locations: In many homes, the main indoor shutoff valve is located near the front perimeter wall where the water service line enters the building, often in a utility room, garage, or near the water heater.
- Outdoor Meter Boxes: If an indoor valve cannot be found or fails to stop the flow, the municipal water meter box near the street or property line houses the main utility shutoff. Operating this valve usually requires a specialized meter key tool.
- Gate vs. Ball Valves: Older properties may feature gate valves with a circular handle that requires multiple full turns to close. Newer installations typically use quarter-turn ball valves; when the handle is perpendicular to the pipe, the water is completely off.
Protecting Electrical Systems and Personal Property
Water and electricity create an immediate safety hazard. If flowing water approaches electrical outlets, baseboard heaters, breaker panels, or plugged-in appliances, you must shut off the electricity to the affected area at the main electrical breaker box. Never wade into standing water if there is any chance it is energized by submerged cords or live outlets.
Once safety is secured, begin moving movable valuables out of harm's way:
- Lift furniture legs off wet carpeting using small plastic blocks, aluminum foil squares, or wooden shims to prevent wood stains and rust from transferring into the floor fibers.
- Clear books, papers, electronics, and clothing off the floor and away from damp walls.
- Empty wooden drawers and storage boxes that sit near saturated baseboards to prevent the wood from swelling and warping.
Managing Houston’s Climate and Humidity Challenges
Properties in the Houston, Texas area face unique environmental conditions when dealing with indoor moisture. High outdoor humidity and warm ambient temperatures create a high-risk environment for secondary property damage, particularly indoor mold colonization. Mold spores can begin germinating on damp organic materials—such as drywall paper, wood framing, and carpet backing—within 24 to 48 hours if moisture is left unaddressed.
To combat humidity accumulation after a pipe failure:
- Open windows and exterior doors only if outdoor humidity levels are lower than indoor levels and local weather conditions are dry. During heavy Gulf Coast rainstorms or high-humidity days, opening windows introduces more moisture rather than removing it.
- Turn on central air conditioning systems if they remain operational and electrical safety is verified. Running the AC pulls moisture out of the indoor air, acting as a natural dehumidifier.
- Utilize portable dehumidifiers and high-velocity air movers to circulate air across damp surfaces, focusing heavily on lower wall cavities and subflooring.
Safe Homeowner Inspection and Damage Assessment
While major structural drying and pipe repairs require professional intervention, homeowners can safely perform initial visual assessments to document the event:
- Inspect visible supply lines in the attic, garage, crawl spaces, and utility rooms for signs of active dripping or bulging insulation.
- Check whether ceilings directly beneath upper-floor bathrooms or roof spaces are sagging or collecting water in sagged plaster or drywall pockets.
- Take clear photographs and video recordings of all damaged building materials and personal property before beginning cleanup, as visual documentation is often required for insurance claim processing.
What DIY Steps to Avoid
Attempting improper temporary repairs can escalate water damage or introduce severe safety risks. Avoid these common mistakes:
- Do not wrap leaking pressurized pipes with standard duct tape, electrical tape, or rubber patches. System pressure will quickly blow past temporary tape wraps, causing renewed flooding.
- Do not use unrated chemical compounds or sealants on active supply lines.
- Do not attempt to pull up glued-down commercial carpeting or engineered hardwood flooring without understanding how subflooring is constructed, as aggressive pulling can ruin salvageable materials.
Hidden Causes and Complications of Pipe Failures
Understanding why a pipe broke helps prevent recurring damage. Pipe failures rarely happen without an underlying mechanical or environmental cause:
- Material Degradation: Older galvanized steel, polybutylene, or aging copper lines develop internal scaling, pitting, and pinhole leaks over decades of service.
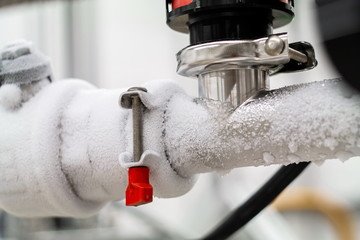
- Thermal Stress and Freezing: During severe winter freeze events, exposed outdoor hose bibs, uninsulated attic pipes, or exterior wall plumbing can freeze, causing ice expansion to split copper or PEX tubing.
- Pressure Surges: Malfunctioning thermal expansion tanks or failed pressure reducing valves (PRVs) can allow municipal water pressure to spike overnight, stressing weaker pipe joints and fittings.
- Slab Settlement: Ground movement beneath concrete foundations can place undue shear stress on copper water supply lines routed beneath the slab, leading to hidden under-slab leaks.
Professional Diagnosis and Comprehensive Repair Options
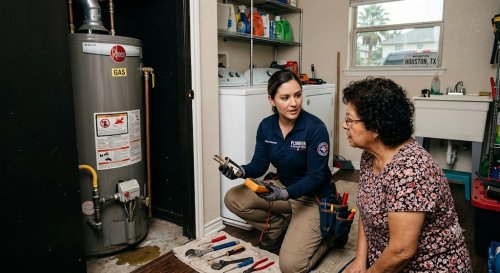
When professional plumbers arrive to address a broken pipe, they look beyond the immediate break point to ensure the entire system is stable. Diagnostic steps typically include static pressure testing to identify whether pressure regulation is failing, thermal imaging cameras to trace hidden moisture paths inside walls, and acoustic leak detection equipment.
Repair options vary based on the pipe material, age, and overall condition:
- Spot Repair: If a pipe failed due to a localized defect, nick, or freeze split, a plumber can cut out the damaged section and install a secure coupling using modern PEX, copper, or PVC fittings.
- Partial Repiping: If inspection reveals widespread corrosion, thinning walls, or brittle plastic throughout a specific branch line, replacing the entire branch prevents adjacent failures.
- Whole-House Repiping: In older properties with chronically failing piping materials, replacing the entire water distribution system with modern cross-linked polyethylene (PEX) or copper provides long-term reliability.
Factors That Affect Pipe Repair and Restoration Costs
The total financial investment required to resolve a burst pipe and its resulting damage depends on several distinct variables:
- Accessibility: A pipe break located in an open garage ceiling or crawl space is far faster to access than a line buried beneath a concrete slab foundation or concealed behind custom tilework.
- Extent of Demolition: Drywall cutting, insulation removal, and structural drying equipment deployment add labor and material overhead to the plumbing repair itself.
- Material Type: Working with older rigid materials like cast iron or rigid galvanized pipe requires specialized cutting tools and transition adapters compared to flexible PEX tubing.
- Emergency Timing: After-hours, weekend, or holiday emergency dispatch involves distinct labor rate structures due to immediate mobilization requirements.
Questions to Ask Before Approving Major Work
Before authorizing extensive plumbing repairs and structural restoration, property owners should ask qualified professionals clarifying questions:
- Is the underlying cause of the break—such as high water pressure or thermal expansion—being corrected alongside the pipe repair?
- Does the repair method require cutting into load-bearing framing or finished surfaces, and is restoration included?
- What warranty is provided on the new pipe fittings and installation workmanship?
- Are current local plumbing codes satisfied by the proposed repair materials and methods?
Frequently Asked Questions
How can I tell if a broken pipe is hidden behind a wall or under a floor?
Clues include unexplained dampness on drywall, peeling paint, warped baseboards, the sound of running water when all fixtures are closed, warm spots on the floor indicating a hot water line leak, or a sudden spike in your monthly water bill.
Should I turn off my water heater when a main pipe breaks?
Yes. If the main water supply is shut off and the water heater continues to fire or receive power while its tank drains or loses supply, heating elements can burn out or gas burners can overheat the vessel, causing severe equipment damage.
Can a pipe break again in the same spot after a repair?
A properly executed repair using compatible materials should not fail in the same spot. However, if the root cause—such as excessive water pressure, corrosive water chemistry, or physical pipe rubbing against framing—is left uncorrected, adjacent sections may fail.
How long does it take to dry out a wall cavity after a pipe leak?
Structural drying typically takes between 3 to 5 days using commercial-grade air movers and dehumidifiers. The exact duration depends on the volume of water released, ambient humidity, and the types of building materials affected.
Is it safe to use temporary pipe repair tape until a plumber arrives?
Epoxy putties or rubber repair clamps can slow down small pinhole leaks temporarily, but they are not reliable for fully burst or high-pressure supply lines. Main breaks and split pipes require complete water shutoff rather than temporary tape wraps.