How to Document a Plumbing Problem Before Repair: A Guide
Learn how to properly document a plumbing problem before calling a professional. Discover key details to record for accurate diagnoses and fair repair estimates.


Why Thorough Plumbing Documentation Matters
When a plumbing failure occurs in a residential or commercial property, the immediate instinct is often to call for help and hope for a quick fix. However, taking a few minutes to carefully document the issue before a service technician arrives can drastically improve diagnostic accuracy, prevent miscommunications, and ensure you receive a precise repair estimate. Plumbers rely heavily on historical clues, behavioral patterns, and visible symptoms to determine the root cause of an issue rather than just treating surface-level symptoms.
In regions like Houston, Texas, where heavy seasonal rainfall, intense heat, expansive clay soils, and occasional hard freezes can place extreme stress on water supply and drainage networks, plumbing problems are rarely isolated. Proper documentation helps separate minor localized glitches from systemic failures. This guide outlines how to systematically record, photograph, and evaluate a plumbing issue before any professional intervention takes place.
What Details Matter Most When Recording a Plumbing Issue
A thorough record goes far beyond simply stating that a pipe is leaking or a drain is backing up. To help a professional diagnose the underlying mechanism quickly, you should gather specific data points as soon as the problem is identified.
Exact Timing and Trigger Conditions: Note whether the problem happens constantly, only when a specific fixture is used, or during particular times of day. For example, does a shower drain slow down only during heavy regional storms, or does a pipe rattle every time the washing machine cycles?
Fixture Interaction: Determine if multiple fixtures are affected. A single slow sink usually points to a localized branch line trap or stopper issue, while multiple slow drains across a bathroom or kitchen typically signal a main branch or sewer line restriction.
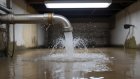
Water Behavior and Characteristics: Observe whether water is clean, discolored, foul-smelling, or accompanied by unusual sounds such as gurgling, hammering, or whistling. Documenting whether the liquid is clear supply water or grey/black wastewater provides an immediate diagnostic shortcut.
Safe Homeowner Checks and Observations
Before a technician arrives, you can safely perform several non-invasive observations to capture vital clues about the problem without risking further damage.
- Check the Water Meter: If you suspect a hidden leak, turn off all indoor and outdoor water-using appliances and fixtures. Check the leak indicator triangle or dial on your main water meter. If it is spinning or moving, water is actively escaping somewhere between the meter and your home.
- Inspect Accessible Supply Lines and Valves: Look under sinks and around toilets and water heaters for moisture patterns. Note whether shutoff valves turn smoothly or feel stiff, which indicates age-related wear.
- Map the Affected Area: Trace the path of the water or noise. For example, if a ceiling stain appears below a second-floor bathroom, note whether the wet spot aligns directly with the tub drain, supply lines, or a wall cavity.
- Test Main Functional Controls: Document if individual shutoff valves actually stop the flow or if they leak around the stem when manipulated.
Visual and Digital Documentation Techniques
Clear visual records are invaluable, especially for property managers, landlords, or homeowners dealing with complex insurance claims or warranty disputes. Effective documentation includes both still photography and short video clips.
Photographing Scale and Context
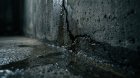
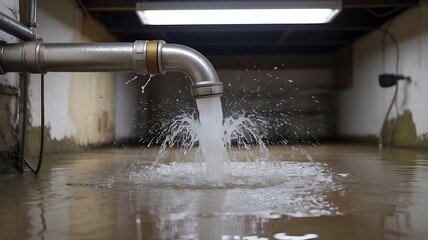
When taking photos of a leak or structural issue, avoid taking extremely close shots that lack context. Start with a wide-angle photo showing the entire fixture or room so a technician can see where the problem sits relative to surrounding walls and flooring. Follow this with medium shots of the immediate assembly, and finally close-ups of active drips, corrosion, or cracks.
Using Scale References
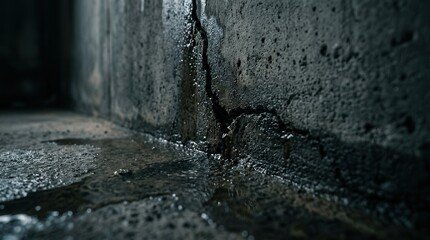
If a crack in a pipe or a corrosion spot on a water heater tank is visible, place a standard object like a coin or a ruler next to the area when photographing it. This provides an immediate visual reference of size and progression if the issue worsens over time.
Recording Audio and Video
Intermittent issues—such as a hammering water supply line, a gurgling toilet, or a clicking pressure-reducing valve—are notoriously difficult to replicate on demand. Record a short video with clear audio capturing the sound, and note the exact action that triggered it.
Hidden Factors Plumbers Need to Know
When you present your documentation to a service professional, share background details that might not be immediately visible. Mentioning these factors helps eliminate false assumptions:
Age of the Plumbing System: Knowing whether a home features original galvanized steel or cast iron lines versus modern PEX or PVC changes how a technician approaches diagnosis.
Recent Property Modifications: Mention recent remodeling work, landscaping projects, or slab foundation repairs, as accidental nail punctures, soil shifts, or altered drainage slopes frequently trigger delayed plumbing failures.
Previous Repair History: If a specific drain has been snaked three times in six months, or if a pressure relief valve was replaced recently, sharing this history prevents technicians from repeating ineffective temporary fixes.
What to Avoid Doing Before Professional Help Arrives
Well-intentioned documentation or DIY troubleshooting can sometimes inadvertently complicate the repair process or destroy vital evidence. Keep these cautions in mind:
Avoid Disassembling Complex Assemblies: Unless you are performing basic troubleshooting like clearing a removable faucet aerator, avoid taking apart threaded pipe connections, gas lines, or pressurized supply fittings.
Do Not Use Chemical Drain Openers on Clogged Pipes: Pouring harsh chemical agents down a backed-up sink or tub not only fails to resolve deep blockages (such as grease accumulation or root intrusion) but also creates severe safety hazards for technicians who may later need to cable or hydro jet the line.
Do Not Over-Tighten Leaking Fittings: Applying excessive force with a wrench to an old, corroded supply nut or compression fitting can easily snap the pipe or crack fixture porcelain, turning a minor drip into an active flood.
Cost and Estimate Factors Influencing Plumbing Repairs
When you provide accurate documentation to a plumber, you help streamline the diagnostic phase, which directly impacts service efficiency. Understanding what drives pricing transparency helps you evaluate repair estimates fairly.
Diagnostic time forms the baseline of most service calls. When symptoms are well-documented, technicians spend less time hunting for the problem and more time evaluating solutions. Repair costs are generally driven by material quality, pipe accessibility, labor complexity, and necessary restoration work. For instance, repairing an exposed supply line in an open utility room involves minimal labor, whereas repairing a concealed leak beneath a concrete slab foundation or behind a finished tile wall requires specialized acoustic leak detection, surface access cutting, and subsequent structural repair.
A professional estimate should explicitly separate diagnostic fees, labor charges, material costs, and any required post-repair drywall or surface restoration. If extensive work is proposed, always ask whether the quoted solution addresses the root mechanical cause or merely treats the current symptom.
Frequently Asked Questions
How far in advance should I start documenting an intermittent plumbing issue?
Start documenting as soon as you notice a recurring pattern. Keeping a written log for three to five days detailing exactly when a gurgling sound occurs, when pressure drops, or when a slow leak appears provides enough behavioral data for a plumber to identify underlying triggers.
Is it necessary to take photos if the plumber is coming out today?
Yes. Active leaks can sometimes temporarily stop due to pressure drops or thermal expansion, and damp areas can dry out by the time a technician arrives. Photos and videos capture the exact peak severity of the problem, ensuring accurate assessments.
Can my documentation help determine if insurance may cover the repair?
Comprehensive documentation—including time-stamped photos of sudden water damage, meter readings, and logs showing rapid failure—is often requested by insurance adjusters to distinguish between sudden accidental damage and long-term neglect.
Should I document the serial numbers of failing appliances?
Absolutely. Recording the make, model, and serial numbers of equipment like water heaters, garbage disposals, or pressure regulators before a technician arrives allows the professional to check warranty status and verify replacement part availability instantly.
What should I do if the plumbing problem stops on its own before the plumber arrives?
Do not cancel your appointment or assume the issue is resolved. Intermittent failures—such as main line backups caused by shifting soil or minor root infiltration—frequently recur. Show your documentation and video clips to the technician so they can investigate the root cause.