Residential Plumbing Installation in Houston: What to Know
Learn what residential plumbing installation involves in Houston, from sizing and material choices to code compliance and local climate factors.

Understanding Residential Plumbing Installation in Houston
Whether you are building a custom home, remodeling a 1950s bungalow, or replacing an aging supply network, residential plumbing installation is far more than simply connecting pipes together. A properly executed plumbing installation requires a careful balance of hydraulic design, correct pipe sizing, code compliance, and an understanding of local environmental factors. In the humid Gulf Coast climate of Houston, Texas, installation choices must account for everything from soil behavior around foundations to extreme summer temperatures and potential winter freeze events.
This guide breaks down what goes into a residential plumbing installation, the critical choices homeowners and property managers face, why proper sizing and materials matter, and how professional installations differ from quick temporary fixes.
The Core Components of a Residential Plumbing System
A home plumbing installation consists of three interconnected yet distinct networks:
- The Supply System: Delivers pressurized municipal water from the city main or private well to fixtures, appliances, and hose bibs.
- The Drainage System: Uses gravity to carry wastewater away from fixtures toward the private sewer lateral or municipal connection.
- The Venting System: A network of pipes extending through the roof that allows air into the drainage system, preventing vacuum pressure that can siphon water traps and let sewer gases enter living spaces.
An error in any one of these three networks during installation can cause chronic operational failures later, ranging from slow drains and gurgling toilets to severe water pressure drops and foul odors.
Material Selection: Matching Pipes to Houston Conditions
Choosing the right pipe materials is one of the most important decisions during a plumbing installation or repiping project. Different materials react differently to water chemistry, temperature fluctuations, and structural movement.
- Cross-linked Polyethylene (PEX): Highly flexible, resistant to mineral scaling, and less prone to bursting during a freeze compared to rigid pipes. Its flexibility reduces the number of fittings required behind walls.
- Copper: A traditional, rigid material known for durability and natural resistance to bacteria. However, it requires soldered joints and can be vulnerable to aggressive water chemistry or external corrosion if improperly grounded.
- Polyvinyl Chloride (PVC) and Chlorinated PVC (CPVC): Commonly used for drain, waste, and vent (DWV) lines. CPVC is occasionally used for hot and white water supply, though local codes dictate where and how it can be applied.
- Cast Iron and ABS: Frequently found in older and modern drainage applications respectively. Cast iron offers superior sound-dampening for multi-story waste stacks, while ABS is lightweight and fast to solvent-weld.
In Houston, where high summer groundwater temperatures and shifting clay soils are common, selecting materials with adequate expansion tolerances and structural resilience prevents premature joint fatigue and stress cracking.
Hidden Installation Details That Impact Long-Term Performance
Many plumbing installation failures do not stem from a defective pipe, but rather from overlooked installation practices:
- Improper Drain Slope: Drainage pipes rely on gravity. If a horizontal waste line lacks the correct fall (typically 1/8 to 1/4 inch per foot depending on pipe diameter), solid waste will settle, leading to chronic clogs. Excessive slope is equally problematic, as liquid drains too fast and leaves solids behind.
- Inadequate Pipe Sizing: Undersized supply pipes cannot maintain volume when multiple fixtures operate simultaneously. If a shower loses pressure every time a toilet flushes, the supply branch may be too narrow.
- Thermal Expansion and Pipe Anchoring: Hot water causes pipes to expand. Without proper expansion loops, straps, and protective sleeves where pipes pass through studs or concrete, friction will eventually wear through the pipe wall.
- Dielectric Corrosion: Joining dissimilar metals (like copper and galvanized steel) without a dielectric union creates galvanic corrosion, causing rapid pitting and failure at the connection point.
How Professionals Approach a New Installation
A professional plumbing installation follows a strict sequence to ensure safety, reliability, and code compliance:
- System Design and Blueprinting: Calculating fixture unit loads to determine precise pipe diameters for supply and drainage.
- Rough-In Phase: Installing supply and waste lines through framing, subfloors, or trenches before walls and concrete pours are completed.
- Pressure and Leak Testing: Filling supply lines with air or water under test pressure to verify that all joints, valves, and seams hold securely before concealment. Drainage lines are similarly tested with water columns.
- Inspection: Verifying that all work meets current local plumbing codes and obtaining necessary municipal sign-offs. Current requirements and permit rules should always be verified with local building authorities or a qualified professional before starting major work.
- Trim-Out Phase: Installing finish fixtures, faucets, toilets, and water heaters, followed by final operational testing.
Factors That Affect Installation Cost and Complexity
Plumbing installation costs vary significantly based on the scope of work and property conditions. Understanding the drivers behind project pricing helps property owners evaluate estimates realistically:
- Accessibility: Open framing during a new build is straightforward to plumb. Retrofitting pipes into finished walls, ceilings, or beneath a concrete slab requires demolition, structural cutting, and subsequent patching, which increases labor time.
- Material Grade: Premium fixture selections, commercial-grade valves, and specialized pipe materials increase material expenses.
- Code Requirements: Upgrades to bring older buildings into compliance with current safety, backflow prevention, and venting standards can add steps to the installation process.
- Foundation Type: Homes built on crawl spaces offer easier access for under-floor routing than homes with monolithic slab foundations where under-slab trenching or overhead rerouting may be necessary.
Questions to Ask Before Approving Major Installation Work
Before committing to a large-scale plumbing installation or repiping project, property owners should ask qualifying questions:
- How have the fixture unit loads been calculated to ensure adequate water pressure throughout the property?
- What specific pipe materials are being used, and what are their manufacturer warranties?
- Does the estimate include pressure testing and mandatory municipal inspections?
- What structural surfaces (drywall, tile, or concrete) will need to be opened, and who is responsible for post-installation restoration?
- How will water service disruptions be managed during the installation process?
Frequently Asked Questions
Can I install my own residential plumbing system?
While minor fixture swaps like replacing a bathroom faucet are manageable for capable homeowners, entire supply and drainage system installations require professional hydraulic calculations, precise slope measurements, and strict adherence to building codes. Improperly installed plumbing can lead to catastrophic water damage, mold growth, and failed municipal inspections.
Why does proper pipe sizing matter so much in a new installation?
If supply pipes are too narrow, friction loss reduces water pressure at remote fixtures. If drainage pipes are incorrectly sized, the system cannot handle peak discharge volumes from modern high-efficiency washing machines and multi-head showers, resulting in sluggish drainage or cross-contamination.
How do local weather conditions affect plumbing installation choices?
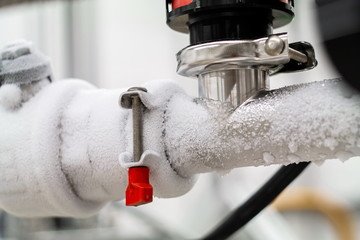
In regions subject to severe weather, such as hard winter freezes along the Gulf Coast, outdoor hose bibs, backflow preventers, and supply lines routed through exterior walls require strategic insulation and frost-proof positioning to prevent destructive bursts.
What is the difference between rough-in plumbing and trim-out plumbing?
Rough-in plumbing involves running all hidden supply, drain, and vent pipes behind walls, beneath floors, or underground before interior surfaces are finished. Trim-out plumbing happens after walls are completed and involves installing visible fixtures, such as sinks, toilets, shower trims, and appliance connections.
How long does a complete residential plumbing installation take?
The timeline depends entirely on project scale. A simple bathroom addition may take a few days of active labor spread across rough-in and trim phases, whereas a whole-house repipe or custom home installation can span several weeks in coordination with other construction trades.